How to scan a multi-storey house in Room Scanner
You can keep a whole house in one project, with a separate floor plan for each storey. Scan the rooms on one floor, save that floor plan, then start the next floor from the same project.
This tutorial uses a three-storey house: Ground floor, Floor 1 and Floor 2. The same steps work for two storeys or a house with a basement. You can use an ordinary project; Estate Agent and EPC tools are optional.
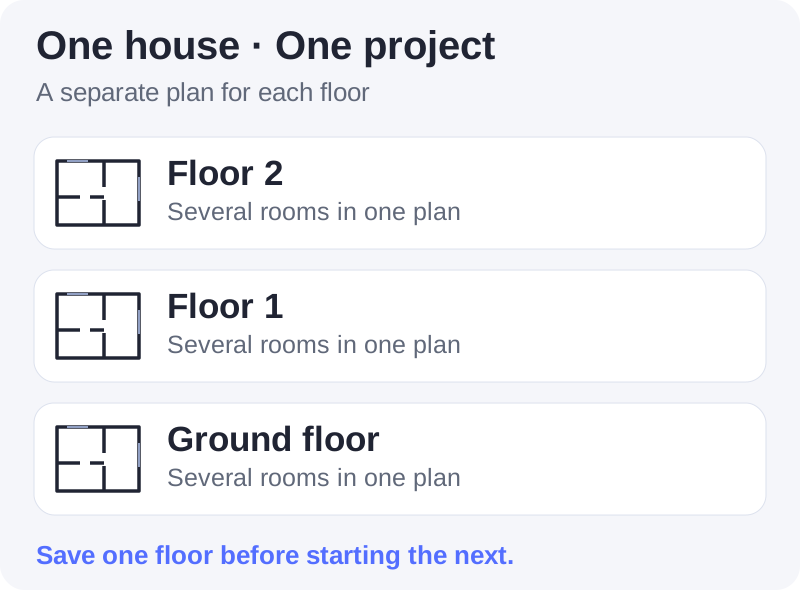
Example organisation. The diagram shows separate floor plans within one project.
Before you start
- Use a LiDAR-equipped iPhone or iPad for live scanning. A device without LiDAR can create plans by entering measurements instead.
- Decide which physical floors you will scan. In the English app, Ground floor is level 0, Floor 1 is the storey above it, and Floor 2 is the next one up. Choose Basement for the level below ground.
- Plan to finish and save one floor before taking a break or moving upstairs. Rooms in an unfinished scanning session have not yet been saved.
- Check the scan allowance shown in your app. Existing saved scans count towards the allowance; Pro removes the scan limit. A multi-room floor plan is saved as one plan.
The finished project keeps your floors together. It does not automatically align them vertically into a single whole-house 3D model.
1. Create a project for the house
- Go to Projects.
- Tap the ⋯ menu at the top, then New project.
- Give the project a recognisable name, such as My house, and tap Add project.
- Open the new project from the Projects screen.
You only need to create this project once. All three floors will be saved inside it.
2. Choose your first floor
- In the project, find Floor Plans and tap Add plan.
- Tap Floor and choose Ground floor. Use Basement instead if that is where you want to start.
- Tap Scan with LiDAR.
Choose the floor before starting, so the completed plan goes straight into the correct section of your project. Not set means you have not assigned a floor yet.
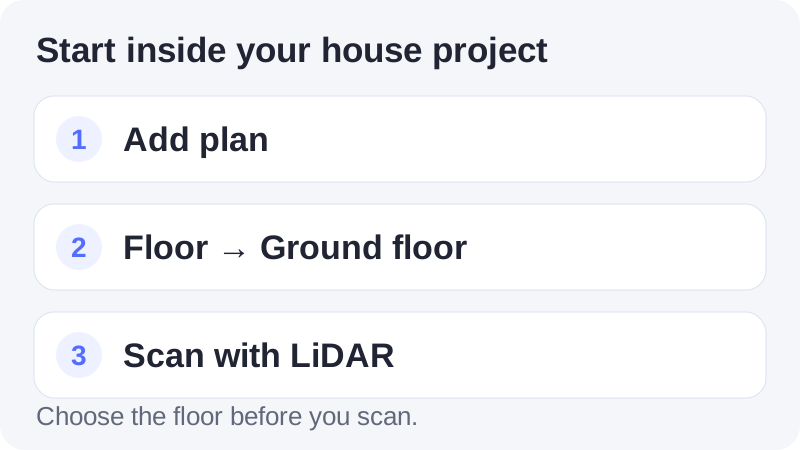
Button sequence in the app. This is a navigation diagram, not a screenshot.
3. Scan the rooms on that floor
- In the first room, tap Start scanning when the scanner is ready.
- Move slowly around the room and follow the on-screen capture guidance. Let the scanner see the walls, corners and openings.
- Tap Stop scanning when you have covered the room. Wait for processing, then review the preview and enter a room name, such as Kitchen.
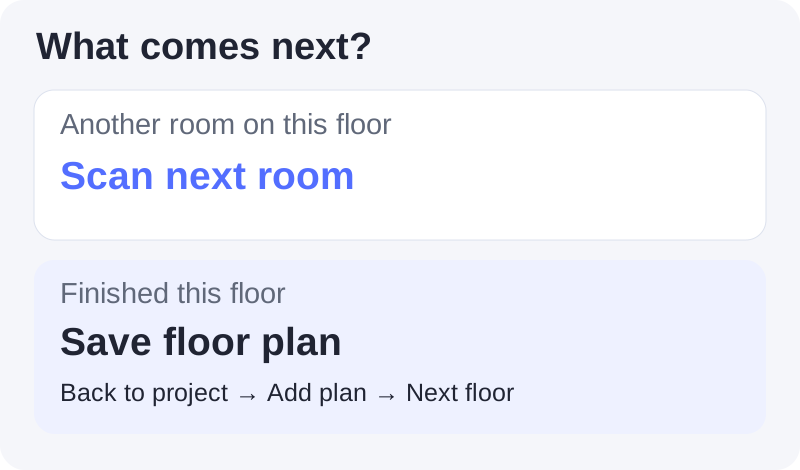
- To include another room on this floor, tap Scan next room. Keep Room Scanner open as you move into the adjoining room. If the scanner is waiting, tap Scan next room again to start capturing it.
- Repeat for the other rooms on this floor, including the hall or landing where relevant.
The plan grows as you add rooms during the same scanning session. Review the result as you go. If the current room needs another attempt, use the orange retry arrow before continuing.
Keep “Scan next room” for rooms on the same storey. Save the current floor before starting upstairs.
4. Save the first floor plan
After reviewing the final room, tap Save floor plan (… rooms). If the floor contains just one captured room, the button says Save & View Floor Plan.
Wait for saving to finish. Because you started from a project, you return to that project and can find the new plan in Floor Plans under the floor you chose. Open it to check that the rooms are present and their joins look right.
If a save error appears, stay in the scanning session and retry saving. Closing and discarding the session would lose its unsaved rooms.
5. Add the second and third floors
For the second storey, stay in My house and repeat:
Add plan → Floor → Floor 1 → Scan with LiDAR
Scan the rooms on that floor and save. Then repeat for Floor 2.
You now have three separate floor plans in the same project. The project displays the highest assigned floor first, so Floor 2 may appear above Floor 1 and Ground floor.
Use the main Add plan action when adding a new storey. The menu beside an existing floor adds plans to that floor.
6. Review your house project
Before sharing, open each floor plan and check:
- The correct rooms are included and named.
- The plan has the correct floor assignment.
- Room joins, doors and windows are positioned as expected.
- Important dimensions agree with measurements you have checked on site.
You can reopen the project later to edit or export its saved plans. For a branded presentation of the property, open its Estate Agent tools; for survey evidence and reports, use EPC surveys. These tools use the plans in your project, so you do not need to scan the house again. Check the app for the export options and access available to you.
Already scanned some rooms or floors
You can file ungrouped saved scans into the house project:
- Open the project and tap Add plan.
- Choose a floor, then Add existing scans.
- Select the saved scans you want to include. Check the floor shown for each selected scan and change it if needed.
- Tap Add at the bottom. The number shows how many scans you selected. For example, Add (3) adds three scans.
Repeat for the other floors. The picker lists eligible ungrouped scans; it does not duplicate scans already filed in the project.
If you saved rooms separately, putting them on the same floor groups them but does not automatically join their geometry. You can use Create floor plan from the project's ⋯ menu to combine suitable scans on one floor, then check and adjust their alignment in Move rooms. Keep different storeys in separate plans.
Common questions
Can I stop after the first floor and return another day
Yes. Save the floor plan before closing the scanner. Reopen the same project later and use Add plan to capture the next floor. An unfinished capture session is not a saved floor plan.
What if I forgot to assign a floor
In the project, touch and hold the plan, open Move to floor and choose the correct level. Do this for each plan that needs an assignment. A floor label applies to the whole saved plan.
I accidentally scanned more than one storey in one plan
Changing its floor label does not split that plan into storeys. Keep the existing scan while you create separate plans for each floor. The project can then organise those floor plans correctly.
Can I add a missed room after saving
Yes, but it starts a separate capture. From the same project, add a plan on the existing floor. Combining that new capture with the saved floor plan may require manual alignment; it does not resume the earlier scanning session.
How should I handle stairs
Save before changing storeys, then start a new floor plan for the next level. Include the relevant landing in each floor's capture and review the result. Project floor assignments do not automatically connect stair geometry between floors.
Why can I not see Scan with LiDAR
That action is available on supported LiDAR devices. On a device without LiDAR, use manual measurements when offered, or capture on a supported iPhone or iPad.
Do I need an Estate Agent or EPC project
No. A normal project can contain multiple floors. Add professional tools when you need their layouts, evidence or reports.
Need help with a particular step? Contact us and tell us which step you reached, your device and your app version. For an introduction to editing and sharing, see How Room Scanner works.
Continue with professional tools
Use the same house project for a branded Estate Agent property plan or an EPC survey with evidence and a report. Both guides explain setup, review, export and returning to saved work.
