From a room to a plan you can use
Explore our room scanners with a practical workflow: capture the space, check the dimensions, try a layout, keep notes and photos, and share the result.
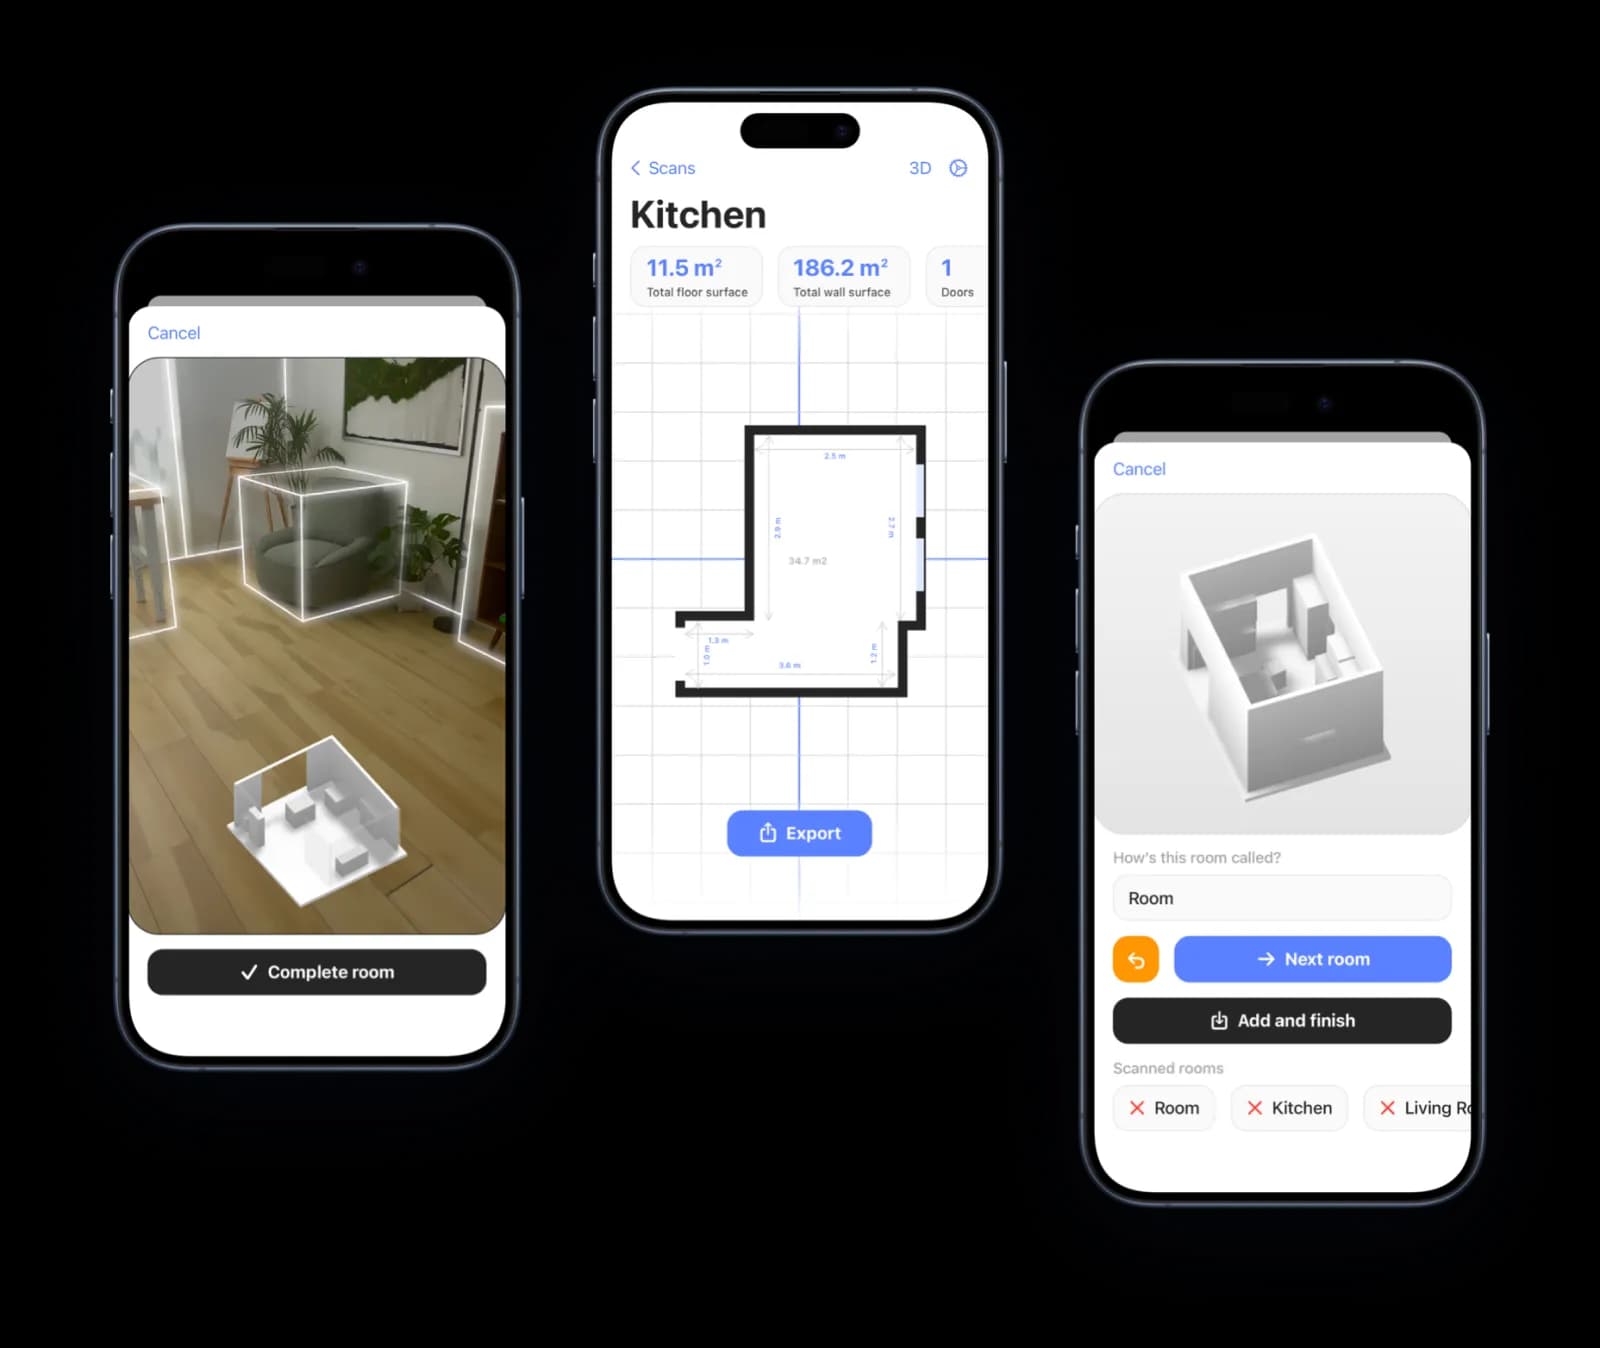
Capture, edit, document and share
Scan with a LiDAR-equipped iPhone or iPad, or create a rectangular or L-shaped room from dimensions on a device without LiDAR. Both routes give you an editable floor plan and 3D model. Review the captured shape and check critical measurements on site before using the plan.
Comparing your options? See how Room Scanner stacks up against other floor plan scanner apps, read our head-to-head Room Scanner vs RoomScan Pro comparison, or see our guide to the best 3D room scanner apps for textured 3D capture.
See Room Scanner in action
Explore a furnished room in 2D and 3D
See how a sofa, tables, chairs and plants fit into a measured living room with a workspace. Explore the furnished 3D model, then create a floor-plan PDF to share.
Recorded with Pro enabled, using example rooms and the English interface in Room Scanner 1.5.16. Edited for length. The videos show plan creation and review, not a live LiDAR capture.
Read the video walkthrough
A saved example living room opens as a 2D plan with dimensions, a sofa, an armchair, a coffee table, a desk and chair, a rug, plants and storage. The view switches to 3D and rotates to show the furniture layout, then returns to the measured plan. The PDF export preview is opened and the completed PDF appears in the iOS share sheet.
How Room Scanner Works
Step 1: Capture the space
Walk slowly around the room with a LiDAR-equipped iPhone Pro or iPad Pro, following the capture guidance. Save one room or continue into the next to build a floor plan. Without LiDAR, start with a rectangle or L-shape and enter measured dimensions.
Step 2: Check and refine the plan
Review the outline, openings and dimensions. In the iOS editor, move corners, enter wall lengths and ceiling heights, add missed doors or windows, and use undo while refining the plan. Check dimensions needed for fitting, ordering or construction with an appropriate measuring tool.
Step 3: Explore a layout
Inspect the space in 2D, 3D or AR. With Pro, place furniture from the catalogue, save alternative layouts and compare them. Saved plan versions let you retain stages of your editing work.
Step 4: Keep the details with the plan
Name rooms, add point-to-point measurements and pin notes or photos where they belong. Organise scans into projects with an address and floor level. For EPC survey preparation, record wall classifications and north orientation in the app; Room Scanner does not calculate an EPC rating.
Step 5: Review and share
Choose a floor-plan PDF, PNG image, USDZ model or portable JSON file in the iOS export sheet. Pro provides professional export options including reports, EPC plans, schedules and CAD drawings; check the app for availability. After iCloud sync, use My scans for browser review and downloading saved data and attachments.
Keep the app and My scans together in your workflow: use iOS for capture, editing and native exports, and the browser to review synced work on a larger screen.
Download the app today and start scanning.
Still deciding between apps? Read our Room Scanner vs RoomScan Pro comparison before you choose.
How Room Scanner works — frequently asked questions
What do I need to use Room Scanner?
For LiDAR scanning you need an iPhone 12 Pro or a later Pro model, or an iPad Pro (2020 and newer), plus the free Room Scanner app. On any other iPhone or iPad you can type a room's dimensions and get the same plan, 3D model and exports. No extra hardware or technical skills are required.
How long does it take to scan a room?
Most rooms take just a few minutes. You hold the device at about waist height and walk slowly around the space while the LiDAR sensor captures it; the app builds the 3D model in real time and generates the floor plan automatically.
Do I need design or technical experience?
No. Room Scanner is built for everyone, from first-time users to professionals. The interface walks you through scanning, and the app does the measuring and drawing for you — there is no learning curve.
How accurate are the measurements?
LiDAR uses light to measure distance, but the accuracy of a completed plan depends on the room, surfaces and capture conditions. Review the result, check critical measurements with an appropriate tool and correct them in the editor before using the plan.
What can I do with a scan once it's done?
Each scan becomes an editable 2D floor plan and a 3D model you can explore from any angle, preview in Augmented Reality, and export to share with clients, contractors, or design software.
Can I edit the floor plan after scanning?
Yes. Drag corners, type exact wall lengths and ceiling heights, add missing doors and windows, flip door swings, straighten a room, add measurements, notes and photos, and place furniture from the built-in catalog, all with undo. Every edit flows into the 3D model and into every export.
